How to Optimize Images for Fast-Loading Pages
Images are an essential part of any website, and without them, even the most beautiful designs, themes, and fonts can appear dull. But it’s crucial to ensure that the images on your website are optimized correctly to improve your website’s performance and page load times. Slow-loading pages can affect your search engine ranking, bounce rates, and ultimately your conversions. This tutorial will discuss everything you need to know about image optimization, website image size guidelines, and actionable ways to optimize images for websites.
Best Image Size for Web
The ideal image file size for your website should be less than 500 KB, with a limit of 20 MB for individual images. The original image’s width should be between 1500 and 2500 pixels for desktops and 640 by 320 pixels for mobile devices.
Image Optimization
To optimize your website images, you must reduce the image file size, so the content loads and renders quickly on a user’s screen. There are several methods to optimize images, including compressing large files, resizing the image, or changing the format. You can also use image optimization tools to automatically reduce the image size by up to 80% without a noticeable loss in quality.
Also Read: How to Build a Successful eCommerce Website with WordPress
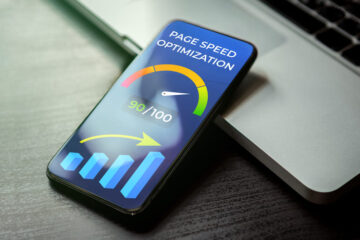
Image Optimization and Website Speed
If your website takes too long to load, visitors will leave, increasing your webpage’s bounce rate. Images are often among the heaviest assets transferred in a browsing session, and they can slow down your page load speeds. To improve your website speed, reduce bounce rates, and increase conversions, use images sparingly and ensure they are optimized for the web before you upload them.
Why You Need To Optimize Your Website Images?
Images are crucial for e-commerce websites, and besides improving site speed, they can reduce bounce rates, improve website performance, help your page rank higher in search engine results, boost conversion rates, occupy less space on your server, and enhance user experience.
How To Optimize Images for Websites?
The ultimate goal of image optimization is to reduce an image’s size while maintaining its quality. But images can make or break a website. Too many or large images can slow down your website and affect performance.
Use WordPress Plugins
The ideal way to optimize images for your WordPress site is to do so before uploading them. WordPress image compression plugins are an excellent, automated solution to optimize images on your website. Some of the best image compression WordPress plugins include Smush, Optimole, Imagify, ShortPixel Image Optimizer, ImageRecycle, and EWWW Image Optimizer. Always ensure that the plugin you choose is updated to work with the latest version of WordPress.
Use Image Caching
Image caching is an excellent way to solve issues that come with unoptimized images, like slow-loading pages. A cache is a storage bank for temporary data, and image caching is when image files are downloaded to local storage to load faster when a user visits a website again. You can improve your website’s performance by storing local copies of your website files that you frequently or have recently used.
Must Read: How to Build a Website From Scratch
Optimize ALT Image
Tags ALT or alternative text replaces an image if the image fails to display or if a visitor uses a screen reader. Search engines need ALT text to index what the image is about, even if the images on your website fail to render. Therefore, it’s essential to provide enough details with relevant keywords in your images’ ALT text to boost visibility. Using ALT text is also an excellent way for e-commerce product images to appear in search engines.
Resize Images
Before Uploading High-resolution and large image dimensions (height and width) are excellent for print, but they can affect website performance. Resize images before uploading them to reduce their file size and maintain website speed.
Optimizing Your Website Images: Host on a CDN and Use the Right File Types, Lazy Loading, and Compression


Images are an essential element of any website, but they can significantly impact your website’s speed and performance. If your website takes a long time to load images, it could result in visitors leaving your website, leading to reduced conversions and engagement.
To optimize your website images, you should consider using a Content Delivery Network (CDN), choosing the correct file types, using lazy loading, and compressing images. In this article, we will discuss each of these topics in more detail.
Host Images on a CDN Hosting your images on a CDN can significantly improve your website’s speed and performance. A CDN is a network of servers that store cached website content in different geographical locations. By doing this, a CDN can help minimize delays in loading web content by reducing the distance between the visitor and the server.
For example, suppose your server is located in New York, and a user in Sweden visits your website. In that case, the CDN will serve the user from a server closest to them, reducing the distance and resulting in faster loading times.
Choose the Right File Types
Choosing the correct file format for your images is crucial because it affects their optimization and total image size. The most popular file formats for images on the web include JPEG/JPG, PNG, and GIF.
JPEG/JPG is a lossy image format that approximates what your original image looks like. Using a JPEG image results in smaller file sizes and offers the best image size for product images and homepage hero banners.
PNG is a lossless image format and carries the largest file size while offering high-quality images. It is the best choice when your image needs a transparent background, such as logos, illustrations, or icons.
GIF is a lossless format widely used for animated images in social media memes and banner ads.
Use Lazy Loading
Lazy loading means delaying the loading of images on your website until the user is close to the image. This way, the image at the bottom of the page loads just before the user gets to it instead of loading with the entire page. Since only a few images are loading, you save on bandwidth, and your website performs better.
If you use WordPress, we recommend adding the Lazy Load by WP Rocket plugin to your website.
Compress Images
Compressing your images is another way to optimize your website’s speed and performance. When you compress your images, you must strike a perfect balance between quality and size. Avoid compressing your images too much, as compression can result in smaller image sizes and lower quality.
There are a few ways to compress your images, such as using image editing tools like Adobe Photoshop or Image Optimize, web compression tools like JPEG mini or Tiny PNG, or using WordPress image optimization plugins like Optimole that automatically compress new images when you upload them to your website.
Top 2 WordPress Plugins to Optimize Images on Your Website There are several WordPress plugins to optimize images on your website. Here are the three most important WordPress plugins to optimize the images on your website:
- Imagify (4.8 out of 5 stars) – This plugin dramatically reduces image files without losing quality, which makes your site load faster. It gives you 25 MB for free each month (about 250 images). Paid plans start at $5 and can go up to $70 per month, depending on your needs.
- ImageRecycle (4.5 out of 5 stars) – This plugin offers PDF optimization and compresses JPGs, GIFs, and PNGs. It gives you 100 MB of data as part of a 15-day trial. While ImageRecycle costs money (between $10 and $50 depending on how many photos you’ll upload during
Content Credit: www.bluehost.in